Motivation
Like most .NET developers, spoiled by C#, I'm not particulary fond of Java. What I always liked about it however, was how easy it is to create HTML documentation from your code comments. I was looking for C# alternatives for a while but none of the solutions seemed quite satisfying. Sandcastle in conjunction witch the Sandcastle Helpfile Builder did actually do quite a decent job, but it required extensive setup, a huge download and the export options seemed a little limited (A Webforms website or a Chm-file - no thanks!). My Sandcastle setup also was far removed from the one-step-build solution I was looking for.
A few days ago I came by DocFx and it seemed like the tool I was always looking for. It's not perfect (yet?) but I think it deserves more attention.
DocFx
DocFx is a Microsoft developed documentation tool. It is open source and you can find it on GitHub.
DocFx seems to take a kind of hybrid approach between a documentation tool and a static page generator like Jekyll.
This way you can combine your code-comment documentation with markdown pages using a dialect of Github-Flavoured-Markdown called DocFx-Flavoured-Markdown (DFM). Reading the docs, the project structure seems to imply that it's meant for .Net-Core projects. However, this isn't the case. DocFx comes as a command-line tool as well as a Visual Studio 2017 plugin. In this post I will only cover the command line.
Integration it into an exisiting project
To get you started I will quickly walk you through the process of integrating DocFx into an exisitng project. Here is the project structure which is kind of typical for pre-net.core projects:
Project
+ Core
  - ...
  - Core.csproj
+ Data
  - ...
  - Repository.cs
  - Data.csproj
+ Tests
  - ...
  - Test.csproj
- Project.sln
Here's an example class Repository.cs, where I put some XML-Comments
using System;
namespace Data
{
public class Repository
{
public Repository()
{
}
public void Greet(string name)
{
Console.WriteLine($"Hello {name}!");
}
}
}
Installation of DocFx
There are several ways of installation described in the docs. For the rest of this article I will assume, you have installed the DocFx command-line-tool somewhere in your PATH so you can use the docfx command from arbitrary locations.
Create a documentation project
The default project setup of DocFx want's you to put your source-files in the src subfolder of your DocFx project. Personally I don't like this, so we will create the DocFx in our Project root folder (Project) and customize the docfx.json a little bit.
Open a command shell. Then run docfx init --output Documentation to create a new project in the new Documentation folder. DocFx will ask a bunch of question - just hit enter a few times to accept the defaults or use the --quiet option.
Now go in the newly created Documentation folder we need to slightly edit the docfx.json to make it do the following things:
- Use the main Project folder (
./..) as root for source files.
- Use all folders to look for source files.
- Ignore our Test project.
Here are all the changes I made to docfx.json. Note the addition of the second src parameter in metadata which sets the root to one folder above the current (..)
{
  "metadata": [
    {
      "src": [
        {
          "files": [
            "**/**.csproj"
          ],
          "exclude": [
            ...
            "**/Test.csproj"
          ],
          "src": ".."
        }
      ],
      "dest": "api"
    }
  ],
  "build": {
    ...
  }
}
Building the documentation
Now open a command-shell in the Documentation folder and run docfx --serve to build the website and serve it from a dev-server.
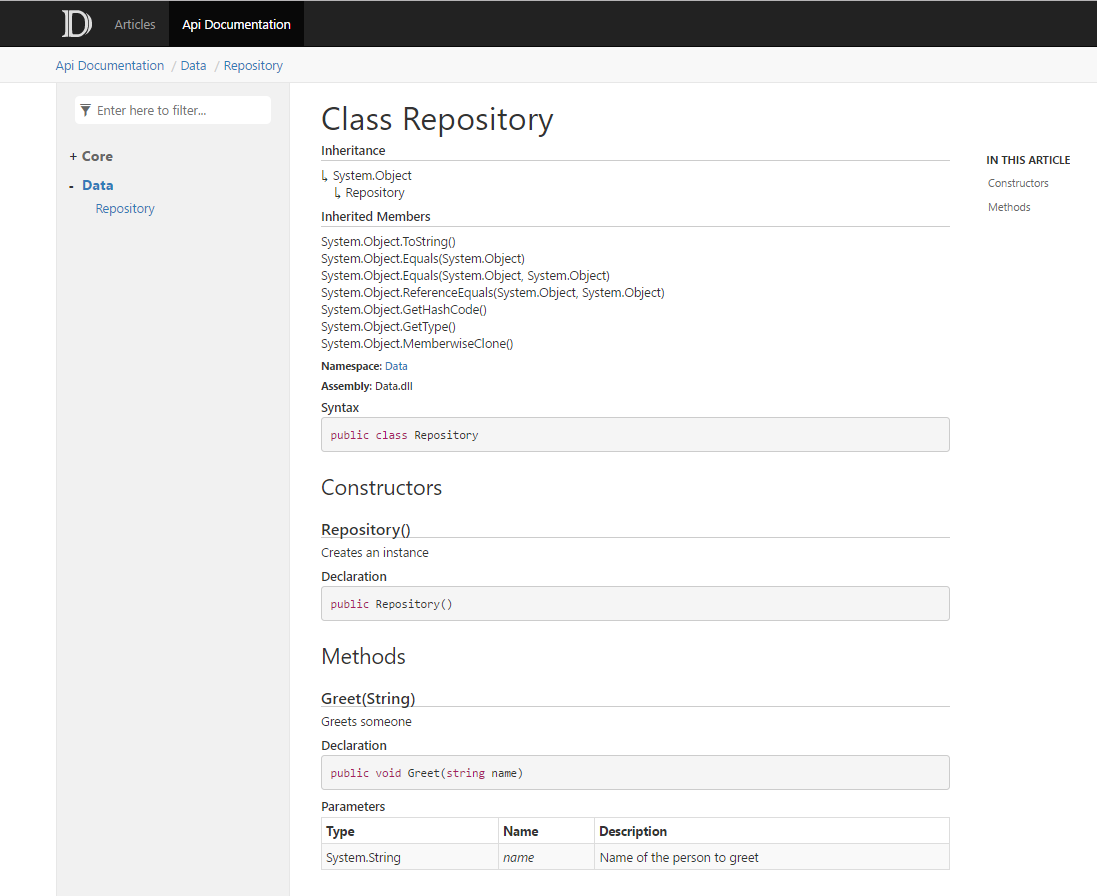
If you head to http://localhost:8080 you should see the generated website and if you click on Api Documentation you should see the generated documentation.
Our example class, for example, will look like this:
Next steps
I hope this short introduction will get you started with creating your own documentation. Next, you could try to change the default markdown files Documentation/index.md, Documentation/articles/intro.md or Documentation/api/index.md. Of course you could also add more articles there yourself or use another theme.